The easiest way to add social icons to your menu is to use a plugin like this.
Without a plugin, you’ll need to do it manually using the method below.
The theme no longer bundles Font Awesome, so first you will need to include Font Awesome in your site. You can learn more about including Font Awesome in this article.
First, navigate to Appearance > Menus and open your menu we’re adding the icons to.
Inside your menu, you’ll see your menu items. If you expand the menu item you wish to add the icon to by clicking the down arrow, you’ll see some fields appear.
In the Navigation Label field, we can add our icon HTML.
You can find the full list of Font Awesome icons here – click on the icon you wish to use and it will give you the HTML you need.
For example, if we want to add a Home icon, we would click on the home icon which takes us to this page.
Copy the code it gives you, and add it to your Navigation Label field (either by itself, or with your other menu item text):
<i class="fas fa-home" aria-hidden="true"></i>
Linking to external sites
We can also use icons to link to external sites like Facebook, Twitter etc..
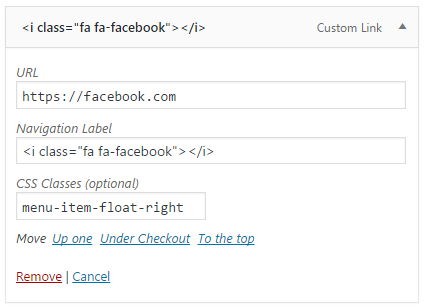
On the left, open the Custom Links module.
In the URL field, add the URL to where you want your icon to point to.
In the Link Text field, we’re going to add our HTML for our icon.
<i class="fas fa-facebook" aria-hidden="true"></i>
Now save your menu, and you have an icon in your navigation!
Floating the icon to the right
In some cases you might want to float your icon to the right side of your navigation, away from your other menu items.
We can do this by adding the menu-item-float-right class to the menu item.
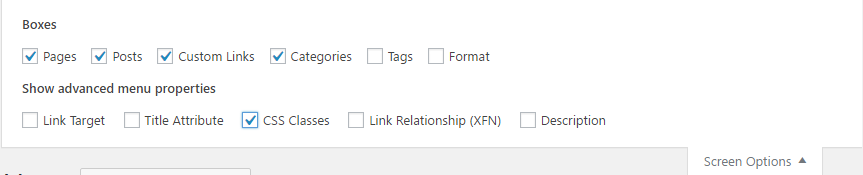
First, make sure the CSS Classes field is enabled by clicking on Screen Options at the top right of the menu page, and checking the CSS Classes field.
Then expand your menu item, and give it that menu-item-float-right class.